
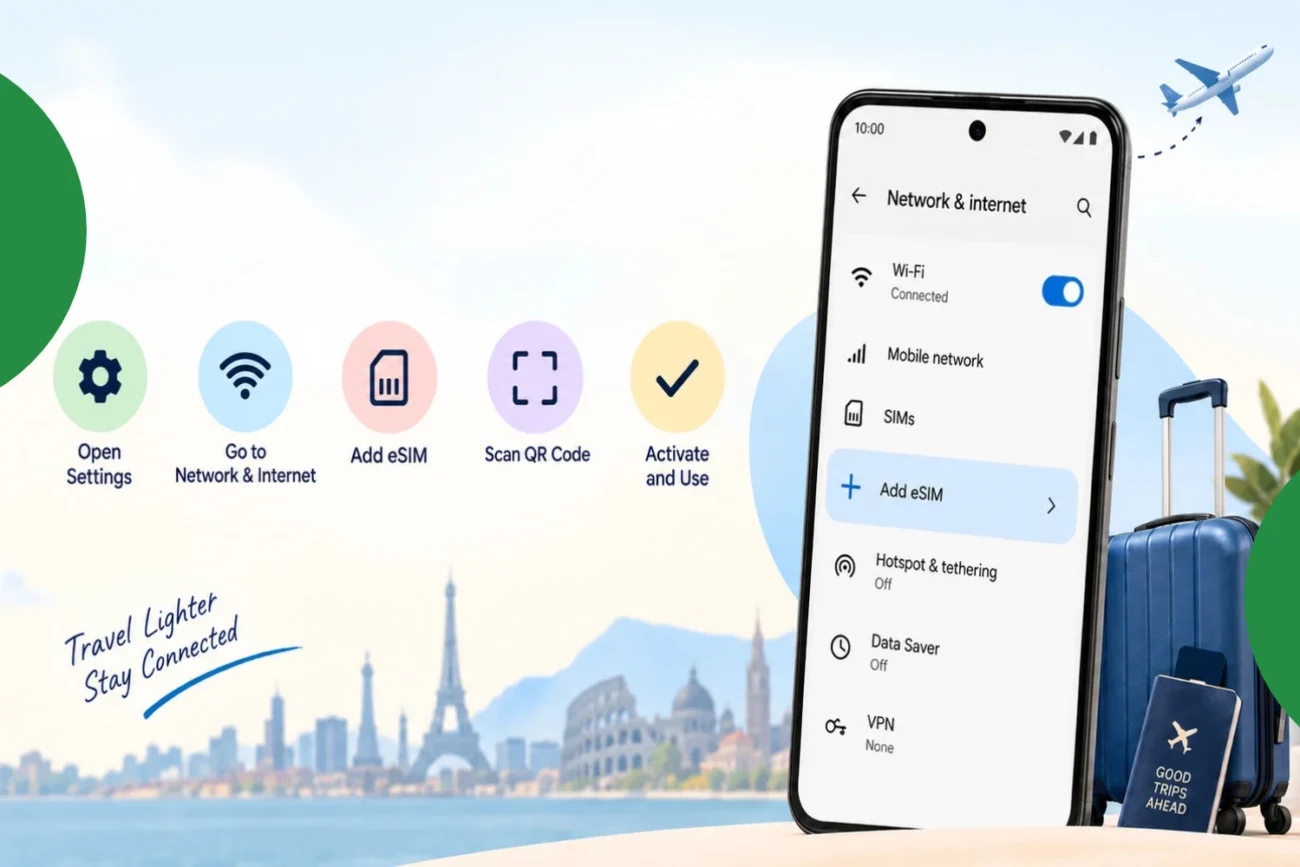
Before we get into the steps, here’s the simple reason to make the switch. Your Android phone may already support eSIM, which means you can activate a mobile plan without using a physical SIM card. Whether you’re preparing for a trip or simply want to avoid swapping SIM cards, converting to an eSIM can make staying connected much easier. In this guide, we’ll walk you through how to convert your Android phone to an eSIM without losing your existing connection or getting stuck during the process.
Quick Answer Converting to eSIM on Android takes about five minutes. Settings, find your SIM options, tap “Add eSIM” (or whatever your specific phone decided to call it), scan the QR code, done. That’s genuinely most of it.
1. Why Android Makes This Weirder Than It Needs to Be
Not your fault, honestly. Apple put the eSIM button in one place, the same spot on every iPhone since the XS. Android? Every brand hid it somewhere slightly different, like it’s a scavenger hunt nobody asked for.
Samsung calls it one thing under Connections, Pixel calls it something else under Network & Internet, and god help you if you’re on a smaller brand with a heavily skinned version of Android.
Once you find the button though, it’s genuinely simple. The confusion is just Android being Android, fifteen menus, one destination.
2. Check Your Phone Actually Supports It
| Brand | Supported From |
|---|---|
| Google Pixel | Pixel 3 onward |
| Samsung Galaxy | S20 onward |
| OnePlus | Most recent flagships |
| Xiaomi | Most recent flagships |
If you’re not on this list or unsure, just search your exact model plus “eSIM on Android,” takes ten seconds.
3. Where to Actually Find the Button
Open Settings. On stock Android it’s under Network & Internet. Samsung buries it under Connections instead, because of course it does.
Inside there, hunt for something called SIM Manager, or just “SIMs,” or “Mobile Network.” Somewhere in that menu sits an option worded like “Add eSIM,” “Download a SIM instead,” or “Add Mobile Plan,” and yes, the wording genuinely changes by manufacturer for no good reason.
4. Scan the QR Code and Install It
Tap it, choose Scan QR Code, and point your camera at whatever code your carrier or Commbitz emailed you. Your phone pulls the profile down in under a minute on decent wifi.
It’ll ask you to label it too, worth naming it something obvious like “Travel” so future-you doesn’t get confused digging through settings at 2am in a hotel room.
5. Set Your Preferences
Last step, pick which SIM handles what. Most people leave their original number handling calls and texts, then set the new eSIM as the actual data line. Especially useful for travel.
6. The Setting Everyone Forgets
Here’s the part nobody warns you about, and it’s the reason half the “my eSIM isn’t working” panic exists in the first place.
Installing the eSIM isn’t the same as turning on roaming for it. Two separate things. Your eSIM can look perfectly installed and active while quietly doing nothing, because that one toggle’s still off.
Go back into your SIM settings, tap the eSIM specifically, and check that data roaming’s switched on. Nine times out of ten, that’s the actual fix.
7. Physical SIM vs eSIM: The Honest Comparison
| Feature | Physical SIM | eSIM |
|---|---|---|
| Setup | Shop visit or paperclip tool | Scan a QR code |
| Loseable | Yes | No |
| Swapping | Manual, annoying | Tap and done |
| Storage | One at a time | Multiple profiles saved |
| Travel-Friendly | Meh | Genuinely great |
If your phone supports eSIM on Android, sticking to physical-only in 2026 is a choice, not a limitation. A weird one, but a choice.
8. Essential Checklist Before You Start
Here’s your checklist:
✔️ Confirm your phone actually supports eSIM
✔️ Make sure you’re on decent wifi before scanning
✔️ Save your QR code email somewhere easy to find
✔️ Label your new eSIM clearly, “Travel” works fine
✔️ Turn on data roaming specifically for the new eSIM
✔️ Do this the night before your flight, not at the gate
9. Where Commbitz Fits Into All This
Once you know how to actually add an eSIM on Android, getting a good travel one is the easy part. Commbitz works the same way, scan a code, done- except now you’re setting up data for wherever you’re actually headed instead of your home carrier.
Buy it before you fly. Install it the night before. You land already connected while everyone else around you is hunting for airport wifi passwords.
10. FAQs About Adding an eSIM on Android
Q1. Does every Android phone support eSIM? No. Mostly recent flagships, so check your exact model before assuming yours does.
Q2. Can I run a physical SIM and an eSIM together? Yes, most eSIM-capable Android phones do dual SIM just fine, one physical, one digital.
Q3. Why does my eSIM show installed but still won’t connect? Almost always roaming. Separate toggle, separate problem, trips up more people than anything else on this list.
Q4. Can I move my eSIM to a new phone later? Usually, yeah, though it depends on your carrier. Some want you to deactivate it on the old device first.
Q5. Do I lose my number when I add an eSIM? Nope. Your physical SIM and number stay untouched unless you remove it yourself.
11. Final Destination
Adding an eSIM on Android isn’t actually hard, it just feels that way because every manufacturer buried the button somewhere different, like it’s a personal grudge against consistency. Find it once, and you’ll never dig through a bag looking for a SIM tool again.
Skip the paperclip. Skip the store trip. Stay connected instantly with Commbitz eSIM. 👉 Ready to activate your next travel eSIM? Get it now and travel smarter.
Get 10% OFF — Download Our App Now!
Enjoy instant savings when you buy eSIMs through our app.